Welcome

I've been asked to begin a blog that shows a "how-to" for the things that bring pleasure to my life. So, the intent of this blog is to share recipes, gardening, composting, sewing, crafts, art, everyday projects and even psychology tips to aid in healing wounds and living the life you're meant to live, a life with purpose!
Art PrintsArt Prints

Thursday, December 20, 2012

Star Cookies and Christmas Goodie Hand-Outs

I made some Christmas cookies and was asked how I got the star in the middle. I was also asked a question about how these cookies compare to the thumbprint ones. And the last question that my friends inquired about: what was in the filling and what was in the glaze? I had a friend ask me last year if I knew of an inexpensive way to ship cookies (she didn't want to purchase the tins). This year, I figured out a way, so I will share that too. So, wha la... you ask and you shall receive the recipe, lol. ;0)

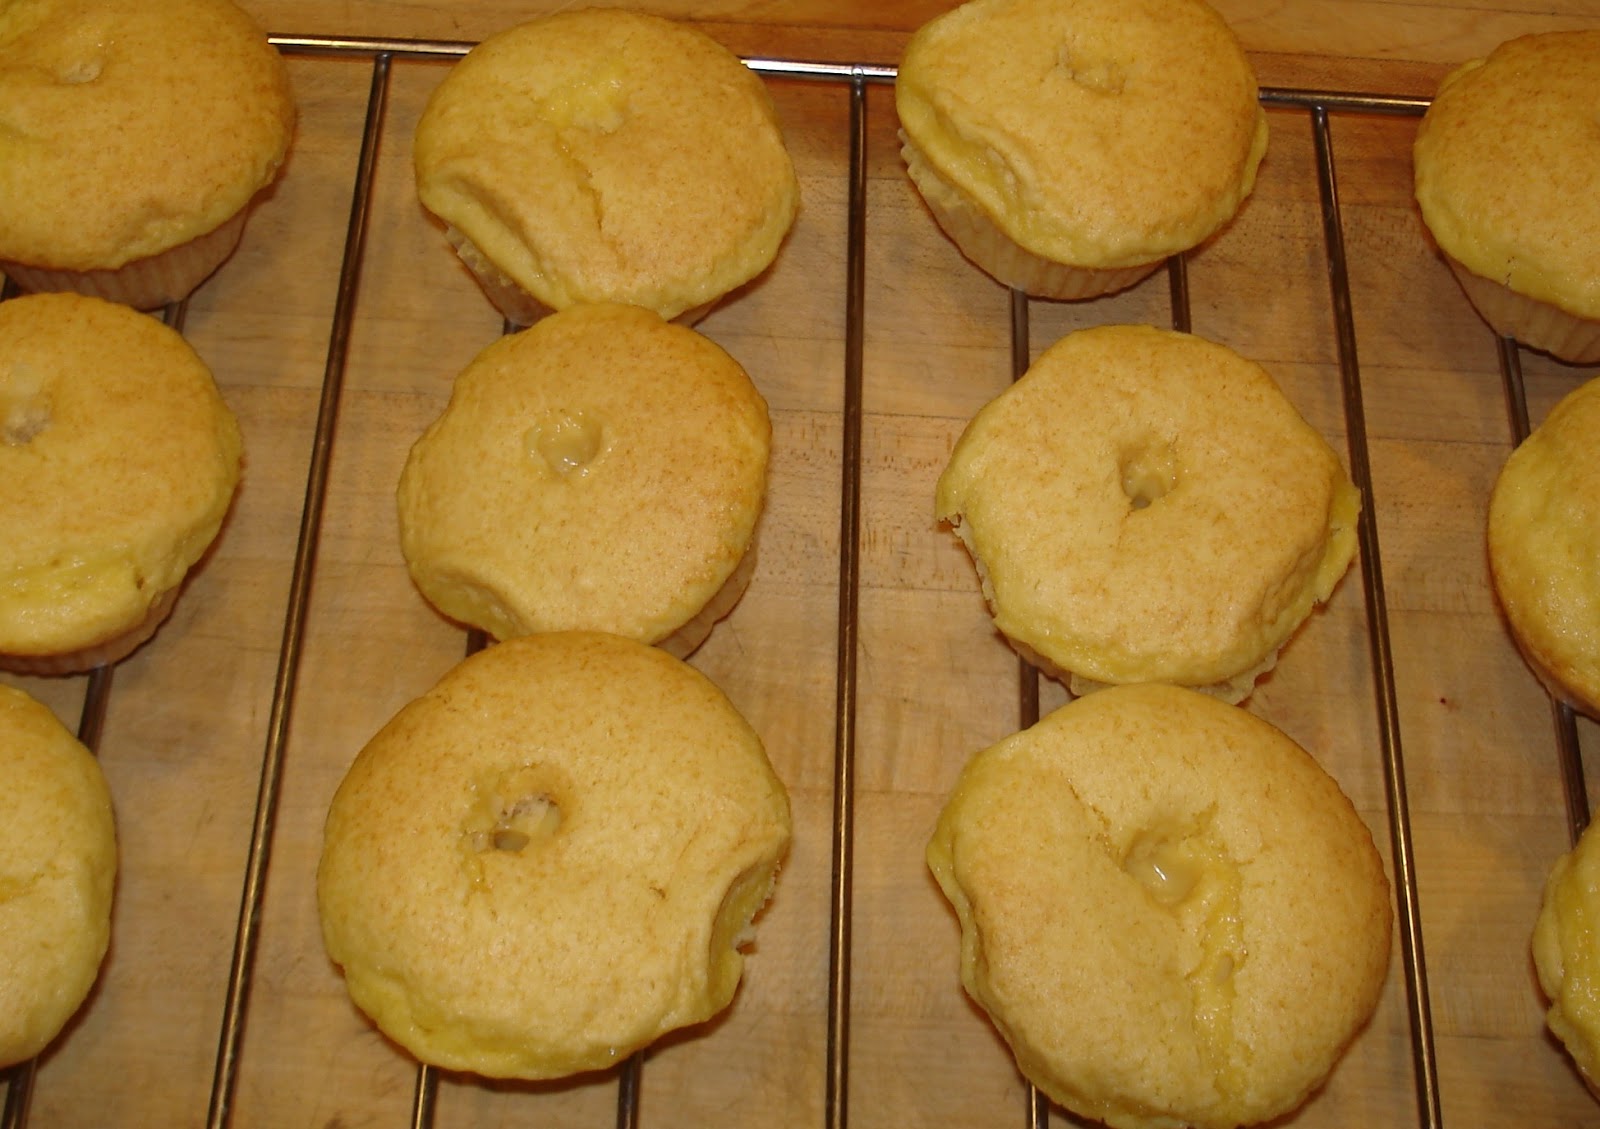
Here are the finished star cookies cooling on their racks. Yum!
Ingredients:
1 C unsalted butter
1 C wht sugar
1 egg
3 C's flour
1/2 tea salt
A Jar each of two kinds of jelly preserves (this yr I choose strawberry and orange marmalade, so I could have some red cookies and some that looked gold; raspberry works really well too).
2 C's confectioners sugar
2 tea almond extract (optional what kind of extract you use).
This yr I also dbled this recipe to get this many cookies in the photo, minus what my family ate before taking pic, lol.
Directions:
1. Preheat oven to 375 degrees F. Spray butter Pam on cookie sheets.
2. In Large bowl, cream the butter and sugar together. Beat in the egg.
3. In a second bowl, combine the flour and salt. Add to the creamed mixture. Dough will be stiff. On a nonstick pie mat or lightly floured surface, roll half of the dough out to about a 1/8 - 1/4 inch thickness. Cut this bottom Cookie into shapes (star or round is usually what I do; as you can see in the image, I did round this yr).
4. Set cookies on the cookie sheet, not touching, so they can rise a bit.
5. Put a dollop of jam in the center of the cookie.
6. Roll out the remaining dough and cut into the round shape w a star in the middle, or a star shape w a smaller star in the middle (any shape is fine). Note* If the dough gets too warm, it will be hard to handle, if this happens, just put the scraps into the refrigerator to chill a bit. This will make them also stick less to your cookie cutter.
7. Bake for 10 minutes, this will vary on how thick your cookies are. Watch until done, is what I typically do. The edges should be a slight golden brown on a few, but the bottoms should not be doughy.
8. Remove from cookie sheet and let cool on racks.
9. In a smaller bowl, mix together the confectioners sugar and extract to form a glaze. Add water one teaspoon at a time if the mixture is too thick (I think I added around 9 tea's per single batch). You want the mixture to drizzle glaze over the cooled cookies. Let the extra just drip off.
You can use two separate cookie cutters to make the wholes in the center (one just much smaller than the larger one). But, here is how I did it:
This cutter comes w many different changeable shapes:
The bottom cookie is left just round, or it could be a larger star.
Here are the jams and extract I used. You can also use gelled icing to color your cookies; I sometimes do, but didn't this yr:
The difference between these cookies and thumbprint cookies is that they are really two cookies on top of each other. The thumbprint style is a thicker cookie that you press your thumb into and fill with filling. These are much thinner because together they make one cookie. You can also use crushed hard candies, I've done that in previous yrs.
Here is how I managed to pass them out, without purchasing multiple tins:
You just need tissue paper (I used white this yr), Glad wrap (optional), cellophane (I used green this yr), ribbon, parchment paper or wax paper, scissors and a handmade tag.
First lay out your material like this:
Cut this large sheet into two:
Note the ribbon is diagonal to make a candy cane stripe.
Wrap the cookies. I added the Glad plastic wrap to keep it fresher, but that is optional. Cut Parchment or Wax paper into circles to place between the cookies, so they do not stick together.
Here is a pile of handout cookies. Twist the ends, tie with your ribbon. Add tag, curl ribbon with scissors, and your done!
--And of course, this is how you can return Tupperware to your generous friends who gave you goodies. ;-)
Merry Christmas and Happy Holidays, everyone!

Sunday, November 18, 2012

Boston Creme Cupcakes
The donut or pie turned into an individual cupcake!
Whipping cream icing:
*Note: Rarely do I use the store bought pudding mix (for me the scratch version just tastes better), but it is a shortcut and these days, I can appreciate saving time. Half of the time I've made the cupcake mix from scratch, but half of the time I've used boxed mixes, bc today's boxed cakes are pretty good! It simply depends on my time limitations. "From scratch recipes" are at the end.

List of Ingredients for cupcakes:
1 1/4 C's cold whole milk
(3-4 oz) box vanilla pudding mix or filling recipe (scroll to bottom for the recipe)
1 Tbl vanilla extract
12 cupcakes made from yellow cake recipe (scroll to bottom for the recipe) or a box of yellow cake mix
1 C heavy cream
(12 oz) pkg semisweet chocolate morsels
1/4 C powdered sugar, sifted (optional; I made some w/o chocolate for my son, who doesn't like chocolate)
Optional: 1/4 C whipping cream
Directions:
1. Bake cupcakes:

Directions Continue; while cupcakes are cooling:
2. Combine milk, pudding mix, and vanilla extract in a Lg bowl. Beat mixture with a hand mixer.
3. Place mixture in refrigerator for 15 min's.
4. Spoon filling or use plastic wrap method for filling into a pastry bag fitted with a tip (I used a 230 Wilson tip)
5. Fill cupcakes w vanilla filling by inserting tip into top of cupcake and squeezing a couple of Tbls of filling into ea cupcake. Note: don't over fill, or cupcake will fall and lay lop-sided or go flat once it cools.
The cupcakes now have filling in them.

6. Heat cream in a small heavy saucepan over medium-heat until bubbles appear around the edges. (Don't let it get too hot, do not boil, or it will change the chocolate). Remove from heat, add chocolate morsels to pan, and whisk until smooth.
Note*: If you prefer a thicker icing, (the kind that does not drip over the sides of the cake), you can add 1/4 C of whipping cream that has been whipped. Gently fold it into your semi-cooled chocolate. Or if you wait for your chocolate to completely cool, it can be spread instead of dripped (even w/o the whipping cream). ;0) So many choices, --I admit: I usually make a whipping cream chocolate and a drizzled one too. Both options are so yummy, and both are too rich, lol... that is a good thing. ;0) [The difference btwn the two: one is more like the drizzle you find in a Boston Creme Pie (see last image of this post), the whipping cream icing is more like you would find on a regular cake (the first image of this post)].
7. Spoon or drizzle glaze over cupcakes, or you can spread with a knife.
8. Refrigerate until set, at least one hour.
9. Optional: Sprinkle with powdered sugar.

An easy way to fill pastry bag with filling:
Tip #1:
Take plastic wrap:

Place filling (vanilla pudding) in middle of wrap, fold plastic wrap around the filling:

Before Twist:

After twist, don't twist too hard, or it will explode, wanna know how I know that? Lol:

Enter twisted plastic wrap through tip whole and cut to tip. Or cut short and pastry bag will hold cream.
If you use a real pastry bag, clean-up is a snap, just throw away the plastic wrap and the bag is clean. ;-)
Hint #2:
Or just drape pastry bag over glass to fill. *(Put your Wilson tip at the end of the bag before filling). This is so much easier than spooning into a hand-held pastry bag! This is a disposable pastry bag, but I've used regular bags this way too. 

Fill cupcakes with filling:

Add optional powdered sugar over 'chocolate drizzled' cupcakes:
Enjoy ;0)

 Optional yellow cake recipe:


  • 2 eggs
  • 1/2 C butter, softened
  • 1 C sugar
  • 1 tsp vanilla extract
  • 2 C's (sifted before you measure) cake and pastry flour
  • 2 tsp baking powder
  • 1/4 tsp salt
  • 3/4 C milk

  • Hand mixer/beat sugar and butter together, add eggs. Add vanilla and milk to wet ingredients' bowl; Mix dry ingredients into a bowl. Combine the two. ;0)

    Optional homemade filling/pudding:


  • 1/2 C sugar
  • 1/4 C all-purpose flour
  • 1/4 tsp salt
  • 2 eggs
  • 1 1/2 C's whole
  • 1 tsp vanilla extract

  • Combine first four ingredients. Slowly stir in milk. Place over medium heat. Stirring constantly, bring just to a boil. Remove from heat; stir in vanilla. Place plastic wrap over, touching the top of filling to prevent a film from forming.

    Sunday, October 7, 2012

    Autie Lisa's Lemonade


    Auntie Lisa’s Lemonade was originally published in 1996, since then, I have added the idea of making syrup, instead of just combining the sugar with the water. Times and techniques change and this is considered the better way today. ;-) I also mix it up and do the variation recipe sometimes, and it was not in the 1996 publication either. ;-) Enjoy your yummy Ice Cold lemonade!

    Ingredients:
    5 lemons
    5 limes, 5 oranges
    3 Qts water
    1 ½ -2 C’s white sugar

    Directions:

    Optional prep: Thinly slice one lemon, one lime, and one orange and place one slice in an ice-cube tray, filling with water and making ice cubes with the slices in them.

    1.       Cook on stove-top the water to a boil, add sugar; making syrup. Stir until sugar is completely melted into the water.

    2.       Take off stove and let cool.
    The strainer will catch the seeds. 

    3.       Meanwhile, squeeze (or juice machine) the juice from four of the lemons, 4 of the limes and 4 of the oranges; pour into a gallon container.


    4.       If you did not make the citrus ice cubes, just thinly slice the remaining fruit and set aside for garnish.

    5.       Add syrup to juice according to taste. (Some will like it sweeter and use all of the sugar syrup; others will like less of the sweet syrup, choosing a more tart taste).

    6.       Serve on ice with the fruit slices froze into its ice cube trays. Or just serve on ice with the fruit slices added as a garnish into the lemonade mixture. Makes 13-16 servings, (about one gallon).
    I grow my own citrus. This is an image of some limes (yes, those orange-sized green things are limes) that I waited to long to pick. They are huge, lol. Not sure if they will yield much juice, but we will see. ;-)

    Variation: For a pulp-like juice, an option, instead of squeezing out the juice of the citrus, is to puree’ the entire fruit, peel and all; making a less clear juice. The peel adds a thickness that is worth trying to see which way you like your lemonade best. Try a half recipe of each version the first time to see which way you like it. The white part of the peel doesn't seem to make it bitter like we would assume. ;-) Note: Also a dash of salt will take away any possible bitterness to whichever recipe version you choose.


    This recipe makes very pretty lemonade with all the colorful peels and fruit! Enjoy! ;0)

    Monday, September 24, 2012

    This time of year, there is nothing that says Autumn better than Mulled Cider.
    Yummy..........................................................................................................................................................................................
    Fall, it is now not too hot, and not too cold to enjoy some outdoor family FuN.
    Taking a thermos of this hot beverage will add to the atmosphere of your outdoor enjoyment.
    Ingredients: 
    1/2 Gallon of fresh, unfiltered apple cider (or make homemade apple cider from smooched cooked apples from your local orchard) I grow Granny Smith and Gala trees, so your backyard tree works fine too. ;-)
    2 large oranges (one just for decoration)
    15 cloves
    4 sticks of cinnamon
    15 allspice berries
    1 teaspoon of freshly grated nutmeg
    7 pods of cardamon or (whole coriander seed)
    1/4 C brown sugar
    1 apple (optional)
    Directions:
    1. Pour the apple cider into a saucepan, cover, turn the stove-top to medium-high heat.
    2. Use a vegetable peeler to peel one of the oranges, to also be used for for a garnish later. Insert half of the cloves into the peeled orange. (or just skip the fancy part and throw the cloves and a cut up orange, peel and all into the pot). Add the rest of the ingredients to the orange and pot. Keep covered and heat the mulled cider mixture to a simmer and reduce heat to low. Simmer for 20 minutes on low heat.
    3. Use a fine mesh sieve to strain the hot mulled cider to catch the solid pieces of spices and orange.
    4. If for adults, you can spike it if you like w: Bourbon, brandy or rum.
    5. Serve hot. Add a cinnamon stick, orange peel, apple slice, or an orange wedge w several cloves poked into it for a garnish. (See picture of garnish).

    Thursday, September 20, 2012

    Autumn & Halloween DIY decorating in my bathroom

    I just love autumn. This time of year just gets to me. This is what I was up to today. ;-)
     Today I cleaned my bathrooms, but felt a bit frisky bc of the briskness in the air.
    Apothecary Jars are great! You can do anything w them. Here I simply took dried grn peas, red beans and popcorn kernels and layed them in the jar. I added a candle to the inside and some burlap and a brown sheer ribbon tied around the outside. Done, too EasY! This arrangement will last the entire Autumn season, --through Thanksgiving.

    I decided to have a bit of fun making some Halloween decor items in my clean bathrooms. These pictures are of our guest bath, that gets the most visitors. ;-) 

     My black kitty was "helping" me... he looks Halloween enough, lol, so I'm including his picture.
    The Sink:
    I simply cut a Casper ghost like shape out of blk paper, poster board would work too. I used double sided tape to adhere my shape to the mirror. EasY!
    The Toilet:
    Here I did the same thing, but on white paper. I had to draw the eyes in w a black marker. Now, if your toilet is white, then black paper would look better, and you could cut out the White's of the eyes, and cut out black circles for the pupils.   ;0)

    I had so much fun w this idea that I thought I'd share... I hope you can "play" this Halloween too. Cleaning the bathroom used to be such a drag... now it is fun! Tee, hee... ;0)

    Wednesday, September 19, 2012

    Easy Balsamic Roasted Chicken

    Balsamic Roasted Chicken
    Need something that is easy? Try this Italian dish tonight. ;-)
    *Note Prep: It takes 15 minutes to combine your first six ingredients; then just leave the chicken in the marinade for 2 hours. Cooking time is 1 hour. Only about 15 minutes of actual work. ;-)

    Ingredients:
    1/3C balsamic vinegar ( I use Colavita brand for cooking)
    3 Tbls dijon mustard (I use MaiLLe brand)
    3 Tbls fresh lemon juice (I used all the juice from one juicy lemon)
    3 garlic cloves, smashed and chopped
    3 Tbls olive oil (I use Colavita brand for cooking)
    Salt and freshly ground blk pepper
    4 Lbs chicken, cut into pieces (I used legs and thighs, but any kind is fine)
    3/4 C low sodium chicken broth
    2 tea lemon zest (good idea to zest your lemon of all it's peel before you get it's juice)
    1 1/2 Tbls chopped fresh parsley leaves (I used flat this time, bc my garden was out of curly)

    Directions:
    1.       Combine first six ingredients into a gallon sized zip-lock bag.

    2.       Cut up chicken into pieces if you are using a whole chicken, or if the leg is attached to the thigh, like mine were.

    3.       Add chicken to bag and refrigerate for at least 2 hours, up to one day.

    4.       Preheat the oven to 400 degrees F. Remove chicken from the bag and dump out the bag, arranging the chicken pieces on a large baking dish that is stove-top usable too.

    5.       Roast chicken for one hour; check to see that it is cooked through.

    6.       Transfer the chicken pieces w tongs onto the serving platter.

    7.       Place the baking pan on a stove top burner. Stir the chicken broth into the pan drippings w a wooden spoon, scraping up any brown bits on the bottom or side of the pan and mixing them w the broth and pan drippings.

    8.       Cook down until the mixture reduces in size. I poured the obvious grease off the top before using it as gravy. I use a grease separator too.

    9.       Drizzle the gravy over the chicken. Sprinkle the lemon zest and parsley over the chicken.

    10.   Serve.
    Balsamic Roasted Chicken, Easy and Yum!

    Saturday, August 11, 2012

    Easy Basic homemade Cheese

    How to make an easy, basic homemade cheese.

    Using whole cow's milk; fresh cheese is just one hour away. ;0)

    Ingredients:
    3 Quarts whole milk (Goats milk would be great if you can get your hands on some!)
    3 C's buttermilk
    1 Tablespoon salt

    Note: this is a basic way to do cheese. You can add herbs like chives, dill and etc to make this cheese even more delish! But, for my purposes, I was making Saag Paneer, and Indian-style dish that uses homemade cheese as it's meat. ;0)

    *I've been asked by a friend to add to this blog what you can add to your cheese: In the past I've added rosemary, lemon thyme, thyme, various basil's, dill, chives, onion, garlic, roasted red bell peppers, pimento, pineapple sage, sun-dried tomatoes, oregano, lavender, mortared peppercorns and various mixtures of herbs or vegetables to make a really flavorful cheese to stand alone as a dip. Any fresh herb will work.

    Instructions:
    1. Line colander with a triple layer of cheesecloth and set in sink.


    2. Bring milk to a boil in a Dutch oven pan over medium high heat. I watch the milk closely and just as it begins to boil over the pan, I add step 3 to stop the spill onto my stove.
    Just starting to simmer around the edges of pan in upper image.

    Getting close to boil in bottom picture; notice how it looks foamy. It is close to try to boil over here. This is when I added the next ingredients in step 3.

    3. Whisk in buttermilk and salt, turn off heat and let stand for 1 minute.
    This is what curdles in pan should look like after the buttermilk is added and cooked. You can see separation.

    4. Pour milk mixture through cheesecloth and let curds drain for 15 minutes.
    Slowly draining:


    Should look something like this before you do step 5:


    5. Pull edges of cheesecloth together to form a pouch. Twist edges of cheesecloth together, firmly squeezing out as much liquid as possible from cheese curds.
    6. Place taut, twisted cheese pouch between 2 large plates. and weigh down top plate w a heavy Dutch oven, filled with water. I drain off some of the water that forms on the plate as I wait; but it is not necessary.
    Plate, cheese, plate, dutch oven I used to cook the cheese is being filled w water just to make it heavier.

    7. Set aside at room temperature until cheese is firm and set, at least 45 minutes.

    8 -A. Remove cheesecloth and cut cheese into 1/2 pieces if you are making Saag Paneer.
    8 -B. Otherwise, keep it in it's lump shape and serve it with crackers.

    9. Left uncut, this cheese can be wrapped in plastic wrap and refrigerated for up to 3 days.

    Enjoy; folks will think you spent days instead of one short hour to make this!

    Labels